By David Worth
Hopefully you will never take the amazing technology that you have at your fingertips today for granted. The reason that you, today’s filmmakers can capture on the RED or the ALEXA or DSLRs and routinely shoot at ASA 800, 2000 or 6400 and beyond, is because of all of the outstanding advances made by the visionary directors and cinematographers of the film industry for the past 100 years!
The groundbreaking films by cinematic giants like D.W. Griffith, Abel Gance, and Orson Welles, as well as Vittorio De Sica and the Italian New Realists, Jean-Luc Godard and the French New Wave, John Cassavetes and the American Independents and especially the New Paradigm that began to take hold in the late 1990’s, all made it possible for today’s filmmaking to be totally democratized and for today’s filmmakers to be able to make their films anytime, anyplace and anywhere.
Just as an example, let me take you for a trip down “memory lane…” and graphically demonstrate the difference between creating a “Demo Reel” back in the day and doing one with today’s technology.
Back in the day, long before any thought of digital capture or non-linear editing, films were always and only shot on film, preferably 35mm film and not that “low budget, underground knockoff” 16mm film.
If you wanted to make a “Demo Reel” or a 15 or 20-minute short film, here are the steps that you had to go through:
Buy short ends of 35mm film and ¼ inch sound tape.
Find enough friends or young hopefuls to work as your cast and crew.
Make sure that you had all the camera, sound, lighting and grip equipment.
Only shoot on weekends so that you could rent the equipment on Friday afternoon, shoot Friday night, all day Saturday and Sunday, then return the equipment on Monday morning and only be charged for one day’s rental.
Shoot your 35mm film negative and ¼ in sound tape to capture your film and be sure to print everything.
Send the film to the lab to be processed and make a one light work print.
Transfer the ¼ inch sound tape to 35mm mag stripe.
Place the 35mm work print and 35mm mag stripe in your upright Moviola and mark all of the picture and sound slated sync marks.
Place the 35mm work print and 36mm mag stripe on split reels on the editing table and run them through a synchronizer cutting out any excess sound so that now you have dailies that can be viewed and projected in sync.
Place each 1000 foot roll of sync dailies onto a coding machine and print a number on every foot of picture and sound so that you can maintain sync while you are doing the editing.
Now you can screen your dailies. Select your best take or takes, break down the 1000-foot reels into separate shots and begin editing.
Do your rough cut, fine cut and final cut make any necessary changed then lock the picture.
Screen your final locked cut for the people doing your music, sound effects, loop lines, as well as the special effects house, title house, etc.
Make black and white dupes of your locked final cut and give these dupes to your composer, sound effects, loop lines department, special effects house, title house, etc.
Send the color work print to the negative cutter to have the scenes pulled for special effects or main and end titles and to conform the negative to your work print.
Have the lab take the cut negative and begin to do silent color corrected prints.
Prepare your 35mm mag stripe dialogue track for the final mix by placing each actor’s lines on a separate 1000 foot roll with fill leader between their lines.
Have your finished main and end titles and special effects cut into the negative at the lab and color corrected.
Do a pre-mix and a final mix of dialogue, sound effects, and Music using your color corrected silent first trial print.
Make a 35mm sound print master (and do “pull ups” for the head and tail of each 2000 foot reel, if necessary).
Make an optical sound negative.
Make a first trial sound and color timed print from your color timed negative and optical sound negative.
Make any additional color corrections…
Have a screening at a 35mm screening room and hope that enough of the producers that you invited will show up to offer you a job…
If not, then you have to continue to have more and more screenings in screening rooms…
By the way all of these steps, all of this work took anywhere from three to six months or longer to complete and at a cost of tens of thousands of dollars…
Today you are able to do it like this:
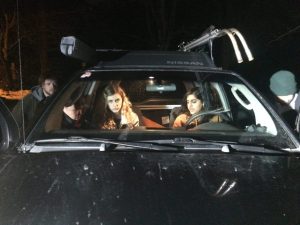
In 2008, a professional New York photographer, Vincent Laforet, managed to get his hands on the new Canon 5D in order to “test” it on the weekend. He and his wife put together a small crew, hired two models, rented a car, some car mounts and a helicopter.
They shot, edited and completed this short film, Reverie, on natural locations and with mostly available light over the weekend and posted this “demo reel” online. Before the end of the first week, Mr. Laforet had a new $50,000 commercial account, because the client was impressed by the creativity and versatility of his short demo reel!
To view the “demo” video, go to: https://www.usa.canon.com/internet/portal/us/home/learn/education/
That is the difference between filmmaking “back in the day” and what’s possible with today’s technology. Remember, Reverie was done with one of the first 5Ds nearly five years ago and as of 2012, Canon introduced the new C300, a professional filmmaking tool that was introduced to Hollywood by no less of a directing icon than Martin Scorsese, that happens to shoot at ASA 20,000!
Get your friends together and make movies!
David Worth’s credits include being the Director of Photography on two Clint Eastwood films, “Bronco Billy” and “Any Which Way You Can.” He was also the DP of the original, “Bloodsport” and the Director of the original, “Kickboxer” starring Jean-Claude Van Damme. He directed the thrillers, “Time Lapse” with Roy Scheider and “The Prophet’s Game” with Dennis Hopper and his most recent production is the horror/thriller, “Hardhat.” David’s book, “The Citizen Kane Crash Course in Cinematography,” can be ordered from www.amazon.com. www.davidworthfilm.com