By Jack Sholder
Everyone knows what a master shot is, right? Director Jack Sholder explains what a master really does, when to shoot one and how editors use it.
Every filmmaker knows the answer. It’s a wide shot that shows everybody and everything that happens in a scene from beginning to end, right? Well, sort of. Does it need to show the whole scene? Not necessarily. Do you have to shoot a master? Not really, but it’s usually a good idea. And when is it a good idea?
There is no rulebook that tells directors what a master is and why they need to shoot one. While I was a working director I shot masters and didn’t think much about it most of the time. When I began to teach directing, I realized I needed to think about the things I didn’t much think about so I could explain the process in a way that was useful and comprehensible to my students. Here are a few things I came up with.
A master should cover as much of the scene as possible. One way to accomplish this is to get way back so the camera takes in pretty much everything. Unfortunately, that’s usually not much of a shot, and it’s not much use in the cutting room other than to start a scene off since it has no point of view.
Assuming you have the means to move the camera, you can usually cover a scene by cleverly choreographing your actors and camera. I encourage you to keep the shot going –not just masters but every shot – as long as you can, which is sometimes well past where you thought the shot would end. Still, particularly in a longer scene, there can come a point where even a good master can fall apart. At that point, you should probably design a second master to complete the scene, or even a third if needed. We sometimes call these mini-masters.
No rule says you must. I shot a film in India, and directors over there would shoot only the amount of each shot, including the master, that they thought they needed for the cut – essentially cutting in the camera. Speaking as a former editor: not a good idea. The Indians did it to save film, but that’s hardly a concern in the digital world. However, I’ve never had a feature go together the way I thought it would and actually work, and neither have my students working on shorter films. The more coverage, the more options you will have in the cutting room. And believe me, you’ll need as many options as you can get.
By the same token, I can think of any number of terrific movies with scenes that essentially had no master. A single of Joe looking right and a reverse of Suzy looking left works even if you never see them in the same shot.
First off, it is the answer to the puzzle of the scene. You can’t direct a scene unless you fully understand what it is about, who it is about, what function it serves in the film as a whole, etc. That is the puzzle. Once you know those answers you can work out the blocking and, based on that, the camera angle and movement if any.
Your master establishes screen direction. Which side of the line do you want to be on?
It helps determine who the scene is about. How the master is set up should show this. Often that character is favored. You can be wishy-washy and shoot a 50-50 master, but those tend to have no point of view which is what directors are paid to supply. That said, sometimes a 50-50 master is the way to go. How to know? That’s why some directors are better than others. They know.
7 Important Things You Should Know
Your master sets the blocking. Once you’ve set up the master you can figure out what you need to cover since everything is now locked and you’ve already solved the puzzle. Another advantage is that pesky actors can’t change things once they’ve shot the master. Even the worst of them understand that the coverage needs to match the master. I speak from experience.
That depends on your style. Some directors, like Woody Allen or Bela Tarr, like to shoot whole scenes in masters. Hitchcock shot an entire film in masters. Watch Rope if you don’t believe me.
My rule of thumb is if it’s less than half a page and it’s not a scene with a lot of emotional changes, just a master is OK. I’d still urge you to shoot a piece of coverage just to cover your butt. Even if the scene is perfect, you may restructure the film and need to cut a line, and then what?
1. First you need to fully understand the scene – see “the answer to the puzzle” above.
2. Ideally, you have already thought through the blocking and the master before you start rehearsing. It’s a good idea to discuss this with the DP first to make sure your blocking works for her. You might need to adjust a bit to make the scene look better or take less time to light.
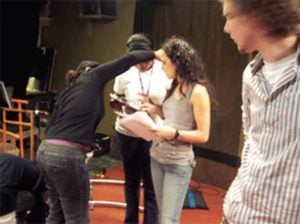
3. Rehearse your actors. A word of caution: never set the camera or lights before the rehearsal. Take my word, it’s a very bad idea and ultimately does not save time. All it does it paint you into a corner. Also, clear the set. The actors and you should feel free to try things out some of which may not work. With the crew watching, there is a tendency to want to give a performance or look good, which is not what you are doing when you rehearse; you are engaging in a process, the end product of which will look good, not the process itself. I generally give the actors a few very general directions – enter from here, sit over there – and then let them run the scene a few times. Then I start adjusting – why don’t you try sitting on this line, etc., often nudging them into the plan I worked out in my head. But watch the actors to see what their instincts want to do and where they want to go. They often know best and can improve upon the ideas you came in with.
4. You want to get to the point where perhaps the dramatics may still need work, but you’re confident of the blocking. At that point, Stop! Check back with the DP to make sure it’s still working for him. Then bring in the keys, show them the blocking, and describe the shot. Make sure your 2nd A.C. put marks down for all the actors’ movements. Then get the hell off the set so the DP can get it lit and ready to shoot. Do any further work with the actors privately off the set. Figure out the starting position of the camera. That is “1.” It’s preferable to have a viewfinder or an app such as Artemis so you know exactly where you want the camera to go. Mark the spot with a piece of tape. Go to your end position. Mark it as “2.” The operator sets up the frame for 1, then sets up the frame for 2, then follows the action as the camera moves from 1 to 2. In some cases you might have one or more intermediate stopping places, in which case you mark those and the operator sets up the frame for those stops. Now the move is from 1 to 2 to 3 etc. That’s all there is to it.
So, some thoughts on mastering the master. Hopefully the next time you go out to film something, this will help you work more expeditiously and confidently.
Related filmmaking guides
- Film directing: getting good performances
- Coverage and the master shot
- What does a cinematographer do?
Keep learning filmmaking
Want more lessons like this? Join StudentFilmmakers free for live webinars with working pros, and stream on-demand filmmaking classes in cinematography, directing, screenwriting, sound and post.