

Your First Film, Part 3 of 4. A short, practical series for high school and college filmmakers.
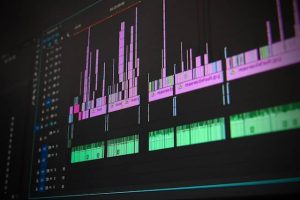
Editing is where your film really gets made. It’s where shots become scenes, timing becomes feeling, and a pile of clips becomes a story. You don’t need to pay for software to do it well. Two of the most popular editors in the world have free versions that can handle everything your first film needs. Here’s how to choose one and how to go from a folder of clips to a finished film. Editing words like J-cut and B-roll are in our Film Terms Glossary (editing terms).
Here is how to edit your first film for free.
1. Pick Your Free Editor
DaVinci Resolve (free version): Windows, Mac, Linux and iPad
Best for: learning the tools professionals use, color, sound
CapCut (free version): phone, computer and web
Best for: speed, editing on your phone, captions
Also free: iMovie on Apple devices
If you want to grow as an editor, start with DaVinci Resolve. It’s the same software used on feature films and TV, and its Cut page is made for working fast (see Resolve’s Cut Page: Cut Quickly, Move Faster). If you want to edit on your phone the same day you shoot, CapCut is quick and friendly. Some effects and templates in CapCut are for paid members, but you don’t need them. Check your school’s rules about apps, too.
2. Organize Before You Cut
Copy: all clips and sound files into one folder on your computer
Back up: a second copy on a drive or cloud storage
Name: folders for picture, sound, music
Ten minutes of organizing saves hours of searching. Never edit straight from the phone’s camera roll on a computer. Copy everything first, then back it up. Losing your footage is the one mistake you can’t fix.
3. Build a Rough Cut
Order: follow your script and shot list
Choose: the best take of each shot, on performance first
Don’t fuss yet: get the whole story in, start to finish
Lay your shots on the timeline in story order, using the take where the acting feels most true, even if another take is a little sharper. If you recorded sound on a second phone, line up the clap now (the sound spike with the frame where the hands meet). Your first cut will be too long. That is normal.
4. Trim Hard
Cut into each shot: as late as possible
Cut out: as soon as the point is made
Goal: 60 seconds or less, every second earning its place
Now tighten. Trim the start and end of every shot. Cut any shot that repeats what the audience already knows. Beginners hold shots too long. Try cutting a few frames earlier than feels right and watch it again. Our 10 Editing Tips: Novice Editorial Mistakes to Avoid lists the most common traps.
5. Fix the Sound
Dialogue: clear and even from shot to shot
Gaps: fill with room tone
Smooth cuts: let sound start a little before the picture (J-cut) or carry over after it (L-cut)
Sound is half the film. Turn up quiet lines, turn down loud ones, and fill silent holes with the room tone you recorded. Listen on headphones and on a phone speaker, because that’s how many people will watch.
6. Add Music You Have the Rights To
Safe choices: music you or a friend made, or tracks with a clear free license
Read: the license for where you will show the film
Mix: music lower than dialogue
Using a popular song you don’t own can get your film blocked online or refused by festivals and challenges, including ours. Music made for your film is best. A musician friend who scores your film becomes a collaborator. Read How to Communicate with Your Composer on Your First Student Film.
7. Color, Titles and Export
Color: match the brightness and color of shots in the same scene
Titles: a short title card and credits, simple and readable
Export: MP4 (H.264), 1080p or 4K, same frame rate you shot
Make the shots in each scene match, so one isn’t bluer or darker than the next. Keep titles short and the font simple. Then export and watch the whole film one more time on a different screen. Show it to one honest friend before you share it, and listen to what confuses them. Want to go further? Try Color Grading 101.
Ready to try it? Our free 1-Minute Film Challenge is open now. This month’s theme is Light, and you can shoot it on your phone. Make a film of one minute or less and send it in before December 31, 2026. We would love to see your work.
Earn your Film Basics badge. Pass five beginner quiz challenges (Everyone Should Know, Camera, Lighting, Sound and Editorial terms) and a gold 🎬 Film Basics badge appears next to your name on your community profile.
Q: What is the best free video editor for a short film?
A: DaVinci Resolve’s free version is the best choice if you want professional tools for editing, color and sound. CapCut’s free version is the fastest way to edit on a phone. Both can finish a short film.
Q: Is DaVinci Resolve really free?
A: Yes. DaVinci Resolve has a free version for Windows, Mac, Linux and iPad that does everything a short film needs. A paid Studio version adds extra features most beginners won’t need.
Q: Can I use popular music in my short film?
A: Only if you have the rights. Unlicensed songs can get your film blocked online or refused by festivals and challenges. Use music you made, a friend’s music, or tracks with a clear license.
In Conclusion
Pick a free editor, organize and back up, build a rough cut, trim hard, fix sound, use music you have the rights to and export an MP4. Your first edit teaches you more about filmmaking than anything else. In Part 4, the best part: sharing your film with an audience.
The Your First Film Series
Part 1: Idea to 1-Minute Script
Part 2: Shot List and Shoot Day
Part 3: Editing for Free (you are here)
Part 4: Sharing Your Film
Next series: Made on a Phone
Additional Resources
A Beginner’s Guide to Editing and Pacing
10 Editing Tips: Novice Editorial Mistakes to Avoid
Resolve’s Cut Page: Cut Quickly, Move Faster
50 Video Editing Tips Every Video Editor Should Know
Film Terms Glossary: Editing Terms
The 1-Minute Film Challenge