By Brian Flees
Want exciting action shots? Brian Flees explains car mounts, hostess trays, suction cups and safety rules for mounting a camera on a moving vehicle.
The best way to show action in a film is to get the camera as involved as possible. This is why today’s audience has not only accepted that cameras can go anywhere – they expect it. Filmmakers often want shots on vehicles, but they are usually too expensive, or the equipment is unavailable on a limited budget. The options then are to do without them, or to do it yourself. The number one consideration with any shot is safety. If it puts anyone physically at risk, it should be left to experienced professionals. The good news is that modern video cameras can be set to adjust themselves or by remote from a safe location. This allows filmmakers to experiment while only taking a financial risk with the equipment. Insurance is also recommended to help reduce that risk.
There are three steps to take before mounting a camera to a vehicle for your shot to be successful. Because of all the variables involved, these are basic guidelines or a foundation to help get you started.
First, decide if you should mount a camera to a vehicle. Common questions include the following: Are there at least three points you can securely fasten to? Will it damage the vehicle? Is there a place to securely fasten a safety line in case the mounts fail? Can you afford to damage the vehicle or camera? Does the shot justify the risk? I ask myself these questions often, and they can help to weigh the risks against the rewards. During a shoot, I was preparing to mount a camera to a very expensive motorcycle. There were several bikes to choose from so the question of whether I can afford to damage the vehicle came to mind. After speaking with several owners, I came across one planning to repaint his Ducati yellow in the near future. That made the decision for me.
Second, decide on a camera. I typically push for the lightest and most inexpensive camera possible that will inter-cut with the rest of the film. The weight will determine the mounting requirements to the vehicle. The heavier the camera, the more expensive the mounts and the greater the risk of damaging the vehicle. Obviously, you don’t want to risk $100,000 on the side of a car when a $10,000 camera will work. I recently spoke with a D.P. who shot b-roll during an HD Varicam shoot with an HDX200 he had less than $10,000 into. On some of the shoots they even considered it a disposable camera. If your primary camera isn’t near $10,000 you should still consider shooting some test footage to determine if a less expensive camera will do the job. I shot a promotional video for a racing school using cameras outside of vehicles ranging from $150 to $3,000 on the same shoot. It really depends on the shot and project.
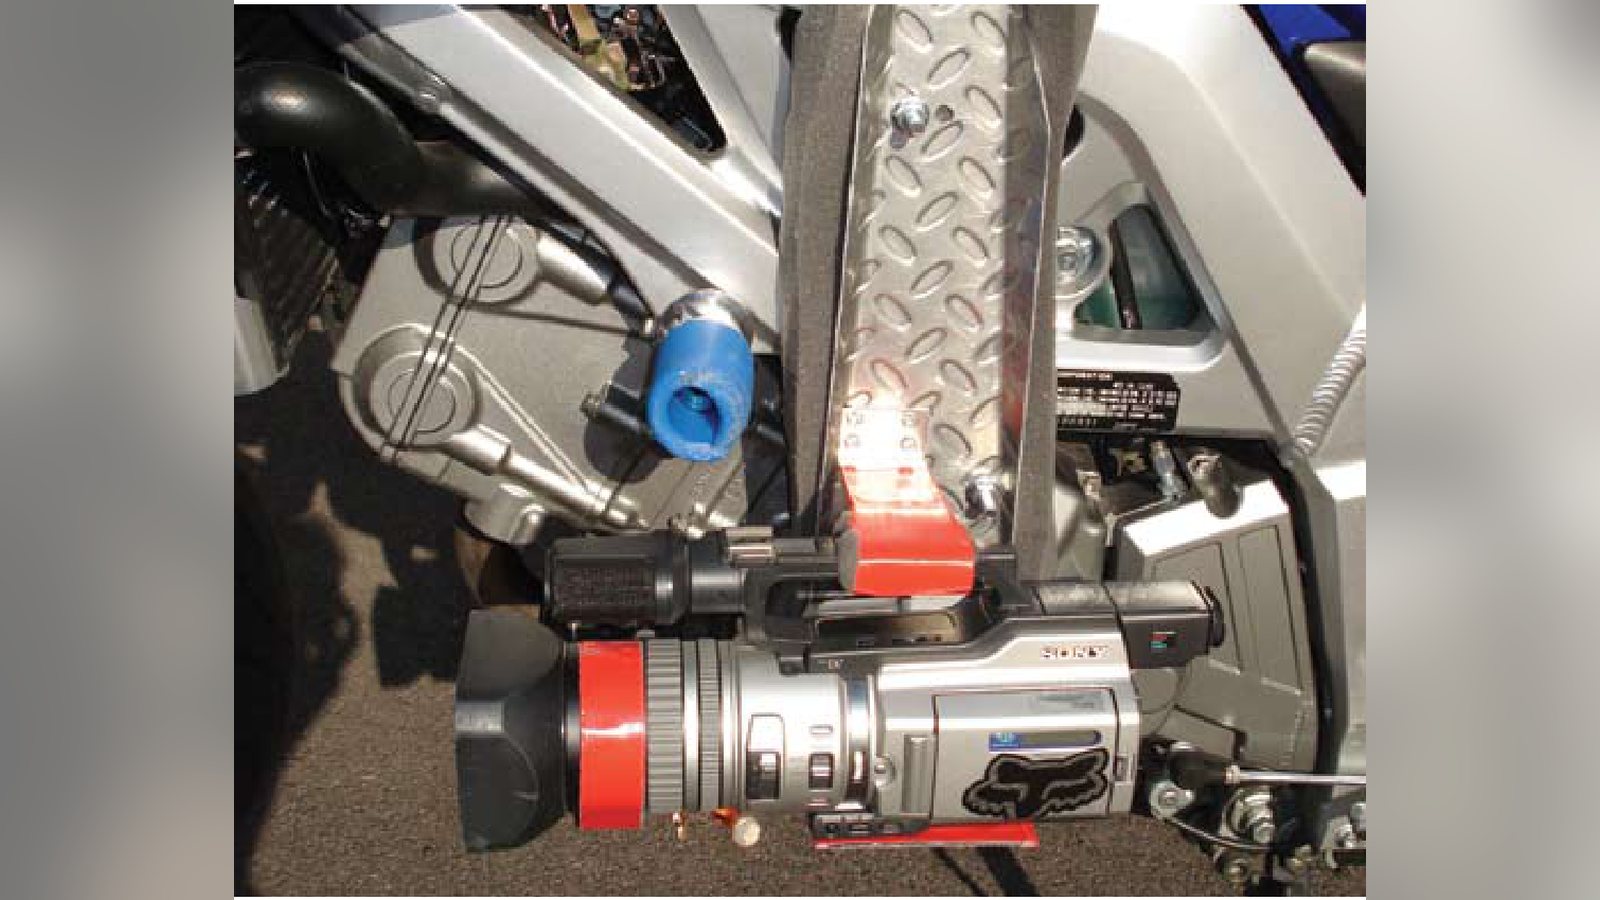
Third, design a mount that works. I worked on a commercial that required a small 24p camera mounted onto a truck in several places. I built a system out of industrial suction cups and electrical conduit that could be cut to length as needed. It gave me flexibility on location because I didn’t have access to the truck before the shoot. Similar setups can be constructed easily with strips of wood, industrial clamps and tie-down straps. The best low-cost solution I’ve found is duct tape. I attached a small, three-chip camera to the gas tank of a sportbike at a race track by placing a piece of soft foam between the camera and bike, then covering it entirely with duct tape to both secure and make it aerodynamic. A small DV deck was placed in a back pack to access the recording functions once the duct tape covered the camera. It is very important to avoid flat straps when securing cameras at speed, as they will vibrate from the wind and interfere with audio and sometimes recording decks. Another thing to watch out for is cheap duct tape; it leaves residue after removal.
Always imagine the camera as if it were experiencing the worst abuse it could receive from the environment it is going to be used in. I had a five pound camera in the most secure mount I could’ve built locked down to a fluid head. There was just enough weight at the top of the camera to shake it every time the car hit a bump in the road. It seemed almost unnoticeable until it came time for the shoot. It allowed the shaking to develop into a vibration that caused lost frames in the footage making it unusable. After discovering this when reviewing the footage, I threw together a support that locked the top of the camera to the mount. The result was perfect footage, but it cost time on the shoot that could have been avoided. Also be sure to have extra materials on location for these kinds of issues as they will always happen when you least expect them to.
Isolating the camera can also help. An easy solution is to wrap the camera in foam, but you must consider the density of the foam. A five pound camera will only be able to compress a very soft foam or a small surface area. One solution is to cut holes in the foam sheet to focus the weight of the camera on key areas. It’s a lot like shocks on a car. If you doubled or more the shocks on your car, it would lose the ability to absorb the imperfections in the road. It would in effect require more weight than you have to compress and take advantage of the shocks.
Protecting the camera might also come into play on a shoot. An affordable option is to modify a camera case. There are several styles to choose from. I recommend looking for hard plastic because it is easy to mount to and seals well for various applications. All you need is a small saw to cut openings for the lens and viewfinder then clear plastic sheet to seal them. I have one I use for shooting everything from ski slopes to small explosions. It also contains a battery and receiver for small wireless cameras. I designed it for a project on radio controlled vehicles where we needed aerial footage from a small plane. The result was a highly portable recording package that could take some abuse.
There are a number of places to get ideas. One is from other movies. If you’ve seen a shot before that you want, look for the movie. Behind-the-scenes productions can be found on most major movies when released to DVD. You might not have the money to do it the same way, but if you simplify the method used, you will end up with something you can afford. Another place to get inspiration – if it’s a chase scene that you want to show your audience, for example, go to a race track. You’ll find ideas coming more easily and in much more unique forms when you surround yourself with fast cars. When I want to come up with a shot for a motorcycle, I go out and ride. What I usually end up with are more ideas than I have time to shoot. Back when I was covering extreme sports, I found the best shots came after I spent time with the athletes. They would even tell me what they wanted to see but didn’t in other programs. That gave me an edge over everyone else. Don’t settle for what’s already out there. While there are many places to get ideas, always be sure to add your own style to the shot. When I first started, my goal was to make movies like the ones I was most influenced by. It was a good way to learn a lot of things quickly, but I could only reach a goal of blending in with everyone else. Especially with the falling prices of equipment and sales pitch that anyone can be a filmmaker, it has become much more important to stand out. It can be as simple as pushing the envelope of camera placement in action shots, or completely redefining the way cameras reveal a story. Try not to lock yourself into anything and always set your ultimate career goals high.
Mounting a camera takes time. Be sure and do several tests before arriving on location. It’s hard to do it right, especially when the crew is all waiting on you. Creativity is the key, and being able to use what you have to get the job done is something learned over time and by experience. Start with a small shot first, build up from there, and the bigger shots will be more successful. Brian Flees is the president of Foresight Films, a Lakewood, Colorado-based film and video production company. His experience includes an AAS degree in film and video technology, certified and experienced metal fabrication background and extreme sports. Credits include television work for Fox Sports International and NBC, local award-winning short film, ‘Out of Time’ and commercial production for national clients. His website and contact information can be found at www.clik.to/foresightfilms.
Related filmmaking guides
- What does a cinematographer do?
- How to become a cinematographer
- Camera angles in film: a beginner’s guide
Keep learning filmmaking
Want more lessons like this? Join StudentFilmmakers free for live webinars with working pros, and stream on-demand filmmaking classes in cinematography, directing, screenwriting, sound and post.