By Todd Debreceni
Lifecasting can be dangerous if done wrong. Makeup effects artist Todd Debreceni covers the safety risks, materials and step-by-step lifecasting process.
Without intending to cause alarm, I am beginning this with a disclaimer:
Lifecasting has the potential to be quite dangerous if done incorrectly. Some of the materials used in lifecasting may encapsulate body hair, enclose or block orifices, cause serious allergic reactions, and create substantial heat, causing burns. That being said, lifecasting is a skill that is not difficult to learn and, once learned, can be used to create myriad lifecasts of body parts, including full-body lifecasts. It is also not something I recommend as a casual hobby; model railroading is less expensive.
If after reading this, lifecasting is something you think you’d like to try your hand at, please take a course or a workshop before attempting to go it alone. While the information here may be more than sufficient for you to try and make a lifecast, get some training with a professional first before venturing into this domain. If you insist on being a self-starter, I suggest that you begin by making a cast of someone’s hand or foot, rather than their head.
Safety Risks
Compared to making molds of inanimate objects, lifecasting can pose some potential safety hazards. Since the mold is made directly on an actor’s body, the materials must be safe and approved for use directly on the skin. There is also the potential for injury if the subject is being lifecast in a standing position, and faints from holding a stationary pose for too long. Feelings of claustrophobia and anxiety can also be a reaction for some actors enclosed in a mold, and it can seem to gain eight, the longer the mold is on. When lifecasting the face, great care must be taken so the actor can continue to breathe when a mold covers their mouth and nose; the nostrils must be kept clear, but not with straws. There are two reasons not to use straws in a subject’s nose when making a lifecast: the straws change the shape of the nose, and even the very slightest of bumps will cause one heckuva nosebleed. Don’t ask me how I know that. If your subject is congested and stuffed up, they will need to take measures in advance of the lifecasting session that will allow them to breathe comfortably while the alginate is covering their face.
While most alginates used for lifecasting are considered to be hypo-allergenic – meaning few people (if any) are allergic – there are rare instances when models have allergic reactions to a material. I’ve lost count of how many lifecasts I have done or supervised – it is many – but I have never experienced an allergic reaction, or had someone faint. I consider myself very fortunate. Fainting comes from a subject standing with their knees locked for an extended period of time. A blocked nostril will create a ruckus. A panic reaction is impossible to miss, but a bit of wet alginate obstructing a nostril is not. Be very careful not to block a nostril or you may have to start over again… after you’ve calmed down and cleaned up your subject!
Other safety concerns to be aware of are with the lifecasting materials themselves – alginate, silicone, and plaster. The alginates used for lifecasting come as a very fine powder, and even when mixed very carefully with water may create a substantial amount of dust. Many alginates also contain crystalline silica, which can cause Silicosis – a disabling, nonreversible and sometimes fatal lung disease caused by overexposure to respirable crystalline silica – so it is advisable to guard against breathing the dust while mixing your alginate. Still interested?
Silicone that is safe for application directly to the skin, such as Smooth-On’s Body Double®, or ArtMolds’ LifeRite® silicone should only be used in a well-ventilated room; it really doesn’t have strong fumes (that I can tell) but why tempt fate… or risk your health? You should also do a small test on the back of your subject’s hand to ensure there is no allergic reaction from the silicone. If you notice any type of skin reaction, do not use the product. Silicone is also very picky about what it comes in contact with.
I don’t personally know any, but there are artists who do lifecasting by applying plaster directly onto the skin of their subjects. That is just stupid, in my opinion. Do not do it! I’ll tell you why. Reason #1: I said so. Reason #2: Plaster heats up as it sets; the thicker the plaster, the hotter it gets… hot enough to cause real burns. Reason #3: Plaster absorbs moisture and over time can seriously dry out your skin. In addition, if someone is foolish enough to apply plaster directly to the skin and failed to release the skin properly so the plaster can be removed, there is very distinct possibility that the plaster will stick to the subject’s skin, making the removal of the plaster very difficult and painful. The reality of the danger of direct application of plaster to skin was illustrated in January 2007, when a sixteen year-old girl suffered third-degree burns after encasing her hands in plaster as part of a school art project in Lincolnshire, England. She subsequently had both thumbs and all but two of her fingers amputated. This is not an urban myth.
The Process
Overview
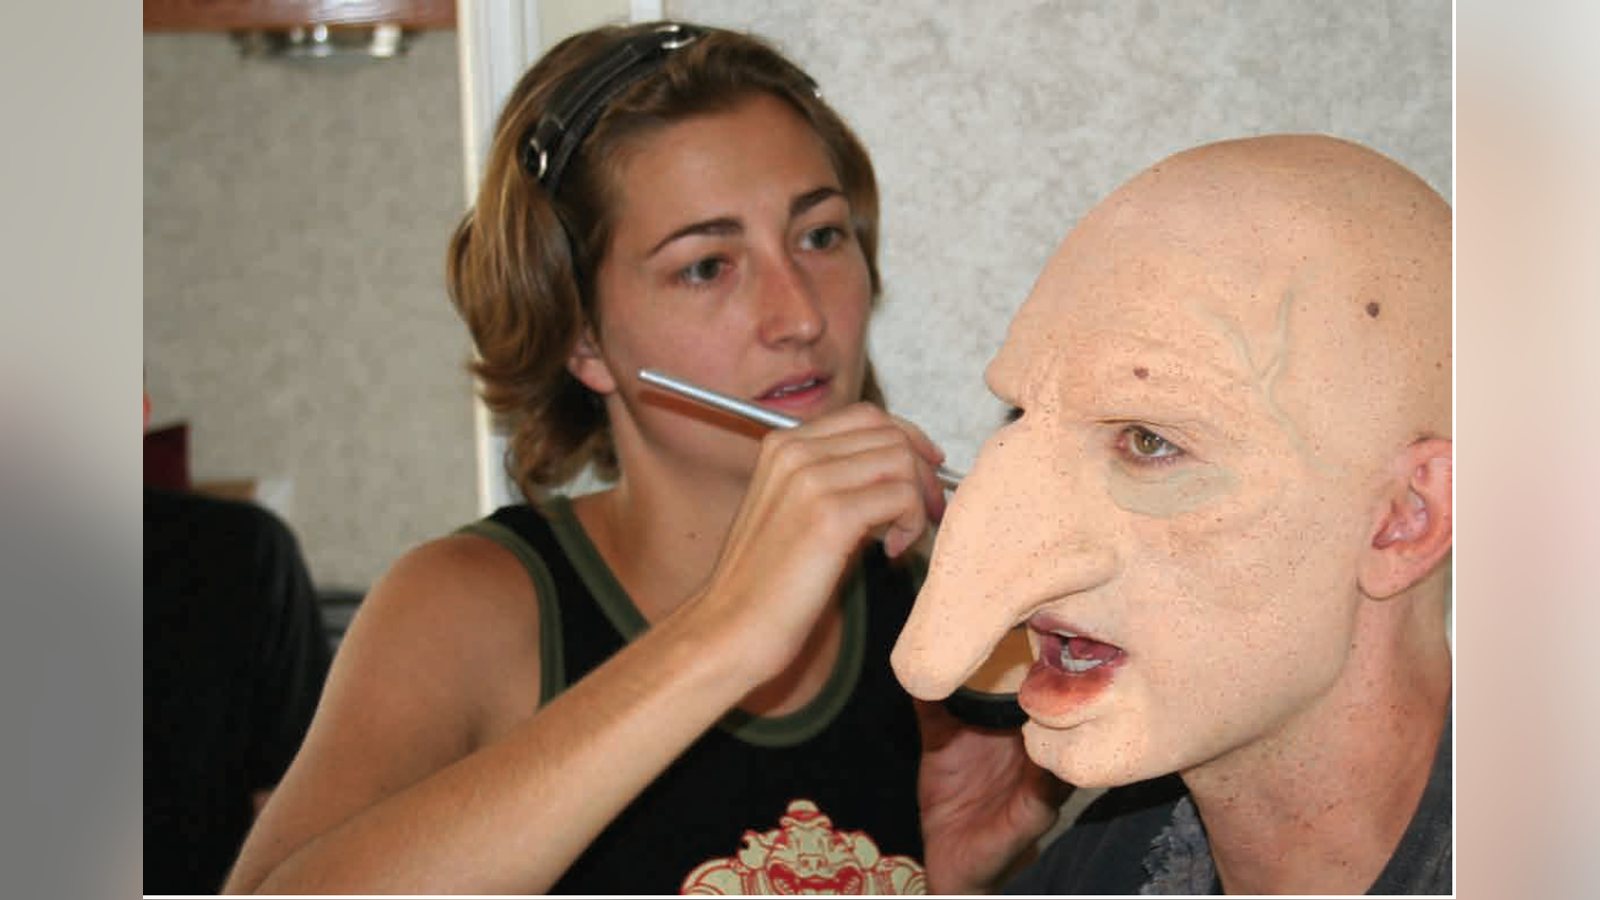
There is more than one way to accomplish almost every task involved in the art and craft of special makeup effects. The actual process of making the lifecast is no exception. Creating makeup effects – of which lifecasting is only a part – requires a number of skill sets, including sculpture, mold making, and appliance (prosthetic) casting techniques. In most professional settings, these skill sets are most often practiced individually, as each requires a good deal of concentrated expertise; however, it is not uncommon to find individuals who are adept at wearing the many hats necessary to take a project from concept to completion by themselves.
Once a negative mold/lifecast has been created, it must be immediately filled with a gypsum stone material called Ultracal 30 to make a positive from the alginate negative.
It is important that this be done very soon after the alginate mold is completed because it will begin to dry out almost immediately. If your positive is not a precise copy of your subject, then the finished appliance will not fit properly when it is applied to your subject later.
Ultracal 30 is similar to plaster, but much harder when fully cured. I sometimes refer to it as Plaster-zilla. The form of the prosthetic appliance is sculpted in oil/wax clay on top of the newly cast positive – after the positive has been cleaned up.
It is very important that the edges of the clay be made as thin as possible to create an invisible edge; the clay is a stand-in for what will eventually be the foam latex (or silicone, urethane or foamed gelatin) piece, and only thin edges will allow the appliance to blend seamlessly into the face when it is applied.
If the prosthetic is going to be cast in silicone, it is critical that the sculpting clay is Sulfur-free, or the silicone will not cure and you will be left with a mold filled with a gooey mess that will be a royal pain to clean up. This is especially true of platinum-cure silicone; tin-cure silicone is more forgiving, but there is no guarantee that it won’t react the same way.
When the second sculpt is completed, a second mold must be made. This results in two pieces of a mold – a positive of the original lifecast, and a negative of the lifecast with the prosthetic sculpted in.
After the sculpted clay is completely removed and the two halves of the mold are thoroughly cleaned, the prosthetic material – foam latex, gelatin, or silicone – is added into the two part mold – either poured, brushed or injected – and the mold is clamped tightly shut and the material cures, creating the beginning of a special makeup effect.
When the appliance is removed from the mold, trimmed, gently washed and dried (only if it is foam latex), it is ready to be pre-painted and applied. Airbrush has become the preferred method for painting appliances in the 21st century, allowing even opaque material like foam latex to be painted with numerous layers of transparent pigment to give the impression of the translucency of human skin.
Keep learning filmmaking
Want more lessons like this? Join StudentFilmmakers free for live webinars with working pros, and stream on-demand filmmaking classes in cinematography, directing, screenwriting, sound and post.