By Bryant Falk
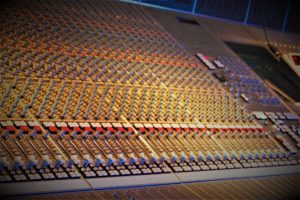
A portable audio edit station lets a director hear and process sound on location. Bryant Falk explains how to build a multitrack computer-based setup.
A portable audio edit station is a multi-track, computer-based audio setup used to record and process audio for production. It allows a director the instant assurance that his audio tracks will be usable for production, and allows the mixing of multiple tracks of microphones with sound effects and music to create almost instant audio playback. When combined correctly with QuickTime, the director can see a rough cut, with (much closer to) full sound, minutes after a take rather than the next day.
- A laptop computer: Mac or PC depending
on which you are more comfortable with.
- Monitors: I would pack some closed ear headphones and some half decent self powered speakers. I’ve found the Bose Companion 2 speakers to be a good compromise. JBL also is well known for solid speakers. The trick here is to learn how they sound and mix accordingly.
- Input device for audio: Options include Mbox from Pro-Tools, Edirol USB input system, or one of many other portable audio hardware boxes.
- Software for computer: Options include Pro-tools, Digital Performer, Logic, or an application you are comfortable with.
- Power Strip and extension chords.
- USB Mouse for extensive editing. (It’s much easier than using a trackpad).
- Extra cables, for example, XLR, RCA, Quarter Inch, etc. (You never know what
you’re going to need when it comes to cables!)
- External Hard drive running at 7200 rpm, (All audio/video drives have this minimum requirement).
So you’ve picked up all the gear. How does it go together? The nice part is it almost assembles itself! USB or firewire from the input device attaches to the same on the computer. The connectors won’t let them fit any other way! The speakers can plug into the line out of the interface box, and the headphones usually have their own jack on there as well.
The external hard drive should also be plugged in and selected as the target for your recorded audio. The hard drive will need to be of the Firewire variety. USB drives just don’t have a consistent enough flow for audio or video. Sometimes you may have to daisy chain your audio device through your hard drive if your laptop only has one Firewire connection.
Notice I don’t have any audio plugging straight into the computer? Only the computer cable from the interface goes in and out of the very “noisy” laptop. Laptops and tower computers are very noisy machines. The whirring hard drives and heat exhaust fans can make for a lot of interference that can be picked up on analog audio. This will then print along with your tracks to the hard drive. The computer cable on the other hand is only transferring digital zeros and ones back and forth.
One of the key things you or someone well-trained will have to know is the software that’s being used. An immediate question is should I use mono or stereo tracks? The quick and dirty answer is all music is stereo, dialogue is mono and sound effects can be both. I’m not even going to touch on surround sound here as it’s far to involved for this article and your portable rig! Mono tracks save space, allow more sounds to be mixed simultaneously and tax the laptop far less than having all stereo tracks. And this is for reference, not the final mix. Pre-mixed music tracks already have involved stereo relationships built in so this should be maintained unless the music is being piped through a small transistor radio at the beach. Then by all means crunch the music down to mono! You may also have to put on an equalizer to create that small radio sound.
With all of the above properly put together you will have yourself a portable rig for editing and playing back multiple audio tracks. One great example of application is when shooting a club scene. After recording dialogue, mix in the music track and see if your actors are saying their dialogue as if they are really in a club. I find since there is no music or loud noise, actors tend to pull in and talk normal which, if you’ve ever been in a club, is next to impossible.
Another example is for a horror movie. Since so much of the suspense and “horror” is based on sound effects/music, slide in all the audio effects, and see if the proper thrill and chill is being achieved! Remember the audio rig is a tool to make sure you’re getting what you’re going for. If say you’re not sure whether a read was believable in a scene, just mix into context and take a listen without picture. If it holds up without picture it will probably do fine when the video is rolling.
This of course is just a sampling of what can be done with a portable audio rig. Mix in Pro-Tool’s ability to rough cut QuickTime movies on the same timeline, and a director can have a lot of questions answered right there on set! A portable rig can give you some serious peace of mind. Not to mention another back up of your audio tracks onto a hard drive! Bryant Falk has been a producer and engineer for over 12 years working with such clients as The Ricki Lake Show, Coca-Cola, Sports Illustrated, Valley National Bank, and MTV’s The Shop. His company Abacus Audio handles many aspects of the audio production field from creative and production to mixing and final output. http:// www.abacusaudio.com/
Related filmmaking guides
- The power of sound in film
- Understanding microphone frequency response
- ADR: automated dialogue replacement explained
Keep learning filmmaking
Want more lessons like this? Join StudentFilmmakers free for live webinars with working pros, and stream on-demand filmmaking classes in cinematography, directing, screenwriting, sound and post.